一、所需环境
- Python3
- Anaconda
二、部署过程
1. 初始化环境
- 创建虚拟环境
conda create -n sd python=3.10.6 - 切换到虚拟环境
conda activate sd - 安装torch的GPU版本
conda install pytorch==1.12.1 torchvision==0.13.1 torchaudio==0.12.1 cudatoolkit=11.3 -c pytorch(1月7日更新) - 测试GPU是否驱动
python -c "import torch; print(torch.cuda.is_available())"
2. 克隆stable-diffusion-webui
git clone https://github.com/AUTOMATIC1111/stable-diffusion-webui.git
cd stable-diffusion-webui
下载插件到目录repositories
git clone https://github.com/CompVis/stable-diffusion.git repositories/stable-diffusion
git clone https://github.com/CompVis/taming-transformers.git repositories/taming-transformers
git clone https://github.com/sczhou/CodeFormer.git repositories/CodeFormer
git clone https://github.com/salesforce/BLIP.git repositories/BLIP
git clone https://github.com/Stability-AI/stablediffusion.git repositories/stable-diffusion-stability-ai
git clone https://github.com/crowsonkb/k-diffusion.git repositories/k-diffusion
3. 依赖安装
安装SD环境
pip install transformers==4.19.2 diffusers invisible-watermark --prefer-binary

安装k-diffusion
pip install git+https://github.com/crowsonkb/k-diffusion.git --prefer-binary

可选 安装GFPGAN,安装后放在虚拟环境的包目录:虚拟环境\lib\site-packages
pip install git+https://github.com/TencentARC/GFPGAN.git --prefer-binary

可选 环境安装
pip install -r repositories/CodeFormer/requirements.txt --prefer-binary

主环境安装
pip install -r requirements.txt --prefer-binary

升级numpy
pip install -U numpy --prefer-binary

安装open_clip模块
pip install open_clip_torch
4. 下载模型
文件一:下载地址:
https://huggingface.co/stabilityai/stable-diffusion-2-1-base/resolve/main/v2-1_512-ema-pruned.ckpt
文件二:v2-1_512-ema-pruned.yaml
model:
  base_learning_rate: 1.0e-4
  target: ldm.models.diffusion.ddpm.LatentDiffusion
  params:
    linear_start: 0.00085
    linear_end: 0.0120
    num_timesteps_cond: 1
    log_every_t: 200
    timesteps: 1000
    first_stage_key: "jpg"
    cond_stage_key: "txt"
    image_size: 64
    channels: 4
    cond_stage_trainable: false
    conditioning_key: crossattn
    monitor: val/loss_simple_ema
    scale_factor: 0.18215
    use_ema: False # we set this to false because this is an inference only config

    unet_config:
      target: ldm.modules.diffusionmodules.openaimodel.UNetModel
      params:
        use_checkpoint: True
        use_fp16: True
        image_size: 32 # unused
        in_channels: 4
        out_channels: 4
        model_channels: 320
        attention_resolutions: [ 4, 2, 1 ]
        num_res_blocks: 2
        channel_mult: [ 1, 2, 4, 4 ]
        num_head_channels: 64 # need to fix for flash-attn
        use_spatial_transformer: True
        use_linear_in_transformer: True
        transformer_depth: 1
        context_dim: 1024
        legacy: False

    first_stage_config:
      target: ldm.models.autoencoder.AutoencoderKL
      params:
        embed_dim: 4
        monitor: val/rec_loss
        ddconfig:
          #attn_type: "vanilla-xformers"
          double_z: true
          z_channels: 4
          resolution: 256
          in_channels: 3
          out_ch: 3
          ch: 128
          ch_mult:
          - 1
          - 2
          - 4
          - 4
          num_res_blocks: 2
          attn_resolutions: []
          dropout: 0.0
        lossconfig:
          target: torch.nn.Identity

    cond_stage_config:
      target: ldm.modules.encoders.modules.FrozenOpenCLIPEmbedder
      params:
        freeze: True
        layer: "penultimate"
两个文件放置目录stable-diffusion-webui\models\Stable-diffusion\
其它模型
|版本|模型|配置文件|
|-------|-------|-------|
|2.0|768-v-ema.ckpt|768-v-ema.yaml|
|2.0|512-base-ema.ckpt|512-base-ema.yaml|
|2.1|v2-1_768-ema-pruned.ckpt|v2-1_768-ema-pruned.yaml|
|2.1|v2-1_512-ema-pruned.ckpt|v2-1_512-ema-pruned.yaml|
三、运行
运行启动程序:
python webui.py --medvram (6G显存可运行)
python.exe webui.py --lowvram(4G显存可运行)
python.exe webui.py 不加参数8G及以上
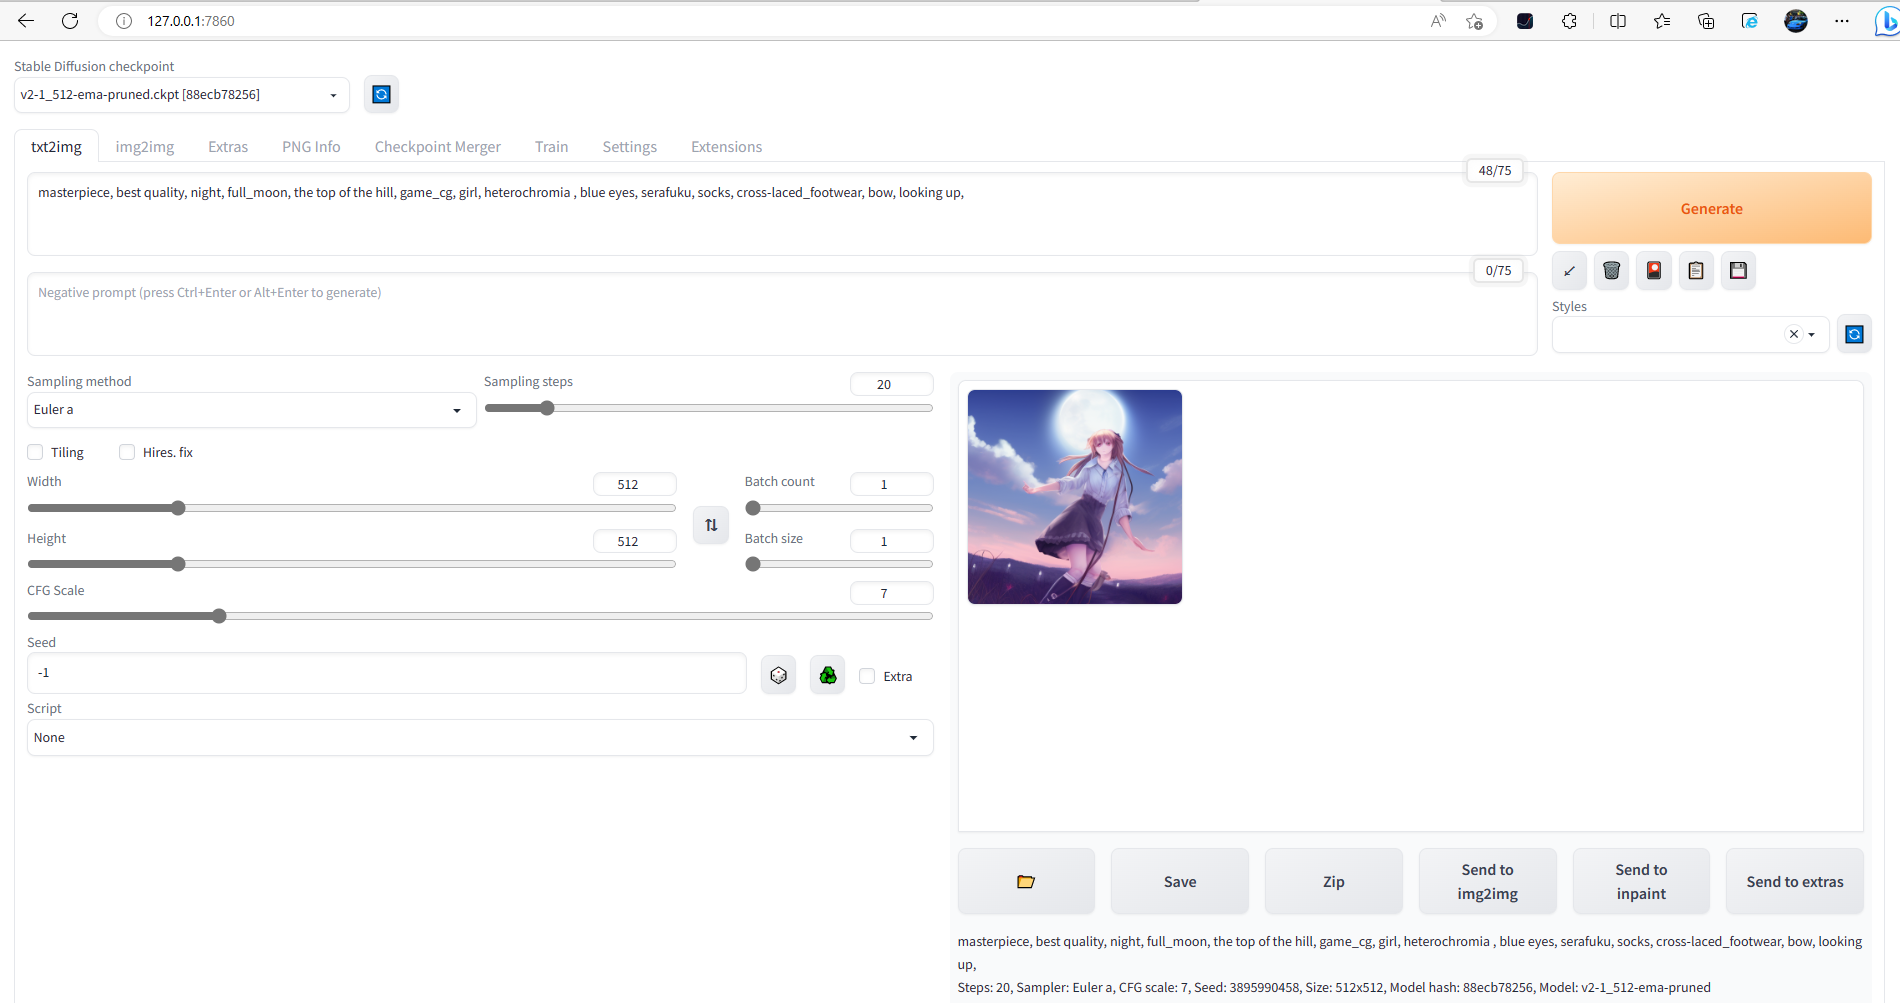
浏览器访问:
http://127.0.0.1:7860
四、其它
1. 安装中文语言包
https://github.com/dtlnor/stable-diffusion-webui-localization-zh_CN
参考文章
12月14日 Stable Diffusion2.1 WebUI本地部署 一镜到底:https://www.bilibili.com/video/BV1F14y1N71W/
NovelAI tag生成器:https://wolfchen.top/tag/